Monday, May 30, 2011

Art Room Project - Project Drawers

This is the tenth post in my Art Room Project series. Find the Table of Contents at the first post, Getting Started.

Project Drawers

A project drawer is used to organize project supplies: drawing, painting, sculpture, fly tying, or whatever I tackle in the future. I can remove them and set them aside while working, then slide them back to their cubby holes when finished. Organized and neat, like I like it.

This is a small box, made from 1/2" inch birch plywood with an oak front.


Plywood on its way to being useful.


The cubby holes with their project drawers. They sit about 1/4 inch proud and will be easier to get out once Teresa picks out some hardware.
A drawer ready to serve. Note how the wood grain lines up when the drawers are closed. That's not an accident.

The bigger drawers in the middle could get heavy when loaded with big stuff. To remove them, sliding wood on wood wouldn't work. I added rollers on the back to help.


The rollers sit a fraction of an inch lower than the frame, and only on the back. Lift and remove from the cubby, and when it sits on the desk, there's no worry of it rolling off.


Next I'll start the finish. A few coats of stain and poly and it'll be ready for the final touches.

Thursday, March 10, 2011

Art Room Project - Cabinet Doors

This is the ninth post in my Art Room Project series. Find the Table of Contents at the first post, Getting Started.


Your Door is Ajar

I built and hung my first set of doors. I'm happy to report my math worked. The doors cover the right amount of cabinet, 1/2" all around. They are relatively square, and meet close to the middle where required.

I splurged and bought the European style hinges, the fancy style with the six way adjustment, so that helped with how they fit. Plus, the hinges were super easy to install and hang. No trouble at all.

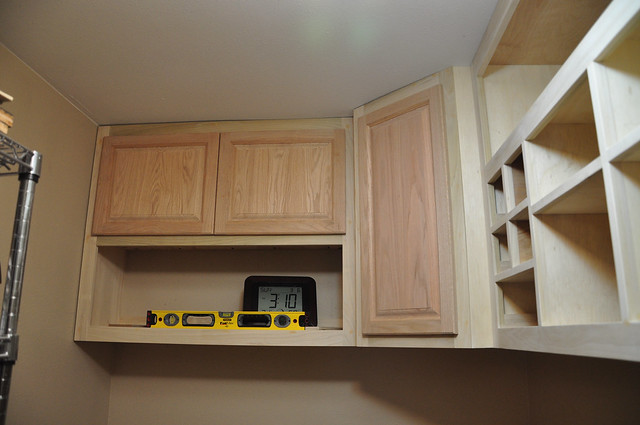
Here we are with the far set of cabinets. The red oak looks a little strange on the white poplar, but remember I'll be doing a two tone finish later.


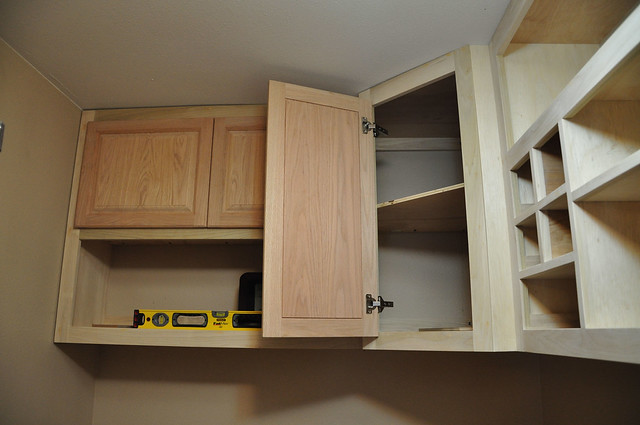
The same image with the door open, in case you can't use your imagination for some reason.

Here you can see the fancy hinges.
View of the side cabinets from the door.


Side cabinets from inside. Door open for dramatic effect.

No more doors to build. Now ends another phase to this huge project. Only a few more phases left!

Next Post: Cubby Drawers

Saturday, February 19, 2011

Art Room Project - Drawer Panels

This is the eighth post in my Art Room Project series. Find the Table of Contents at the first post, Getting Started.

Time for the Details

The bulk of the cabinets are made. Now we work on the details, starting with the drawer face panels.

Bits...

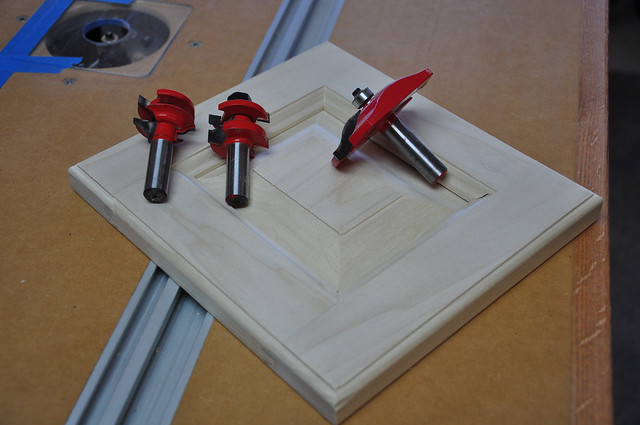
A friend, Andrew, let me borrow a set of door making bits for my router. These are heavy duty, 1/2" shank bits, designed to shape a lot of wood. I was a little intimidated by them at first, but after a few test runs and a couple of real panels I'm comfortable with the process. Any woodworker with a good router table and a little patience can make some great doors.

...and Pieces

The frame and panel is easy to cut. Edge glue and clamp some boards for the panel. Trim two rails (top and bottom) and two stiles (left and right) to size (standard 2") and you are ready to go.

The trick is knowing what size to cut the pieces so when they are put together, the door covers the opening at the size you expect. The math is easy once you see it work a couple of times.

Finished Look

I finished the top two drawers with a solid oak board with a beading trim around the edge. The larger door is an oak panel.

Finally, we have an oak panel to finish off the trash drawer.

Next I'll be finishing the doors. This will be fun with installing hinges and adjusting for how the doors meet up.

Next Post: Cabinet Doors

Saturday, January 22, 2011

Art Room Project - Upper Desk

This is the seventh post in my Art Room Project series. Find the Table of Contents at the first post, Getting Started.

Scratch the Surface

Now we are getting to some fun stuff: creating the desk top. This is the surface where I'll work, cut, paint, glue, scrape, bleed, etc. The issue, which I had not addressed until I got to this point, was what material to use for the top? It didn't seem important until now.

Top Type

During the design, I assumed it would be a Formica or other laminate top--maybe a pre-built one from the hardware stores and cut to fit. As I built the cabinets, this didn't feel right. I had all this custom work, only to drop in a kitchen top? So I talked to Teresa about my ideas. Maybe I should just make an oak top. I could even do end grain up, like a cutting board, so it would be tough and easy to sand and fix.

Teresa's concern was the look. After a few months of use, the top would be glued and painted and all-around-ugly. Her suggestion was a having a top that could easily be changed out. This triggered an avalanche of ideas where we finally settled on what I made below. I'm glad to report we are both very happy with the design. Well, I like it and Teresa doesn't hate it, so that's a win in my book.

Desk Panels


The design was easily updated where the desk top is a solid 1.5" thick and 3" wide, red oak frame around the desk edges. The center part is divided into 5 panels that can easily be changed out as needed.

The image on the left shows the frame with temporary MDF panels in place.

Naked Desk

The desk shuns modesty and sheds its panels. I have three larger panels across the front and two smaller on the side.

The core of the panels will be MDF. It is sturdy, stable, and flat. I'll top one side of the panels with oak plywood which will be finished pretty. I guess I'll turn it to this side when company visits.

The other side will be some sort of work surface, such as a laminate or cutting board material.

Panel Support

The panels must have a sturdy but adjustable support. The panels could be different thicknesses and if the panels move while working, it will cause all sorts of frustration and gnashing of teeth.

This details shows how the supports are made.

1/2" plywood parts with tee-nuts inserted to hold standard bolts. To protect the desk panels, the bolt heads were dipped in a plastic dip, covering the head in a durable rubber coating.

To raise and lower the panels, just screw the bolt in and out.
The larger panels have 8 bolts, but the smaller panels just have 4.

Panel Ideas

Having the two layer desk and removable panels have opened up all types of options. One idea is to make a light box panel made with a frame, glass top and LED lights. Another option is to have a panel with recessed spaces for paint or paint brushes or other organizational feature. Yet another idea is to have a panel on an angle like a drawing table.

I love when a design opens up options rather than shutting them down. I'll keep you posted on the types I end up building. For now, however, I need to move on to finish this project!

Next Post: Drawer Panels

Saturday, January 8, 2011

Art Room Project - Lower Desk

This is the sixth post in my Art Room Project. Find the Table of Contents at the first post, Getting Started.

Work on the Work Area

Time to focus on the work area. I built the trash cabinet first. This holds up the lower desk on the left.

Trash Cabinet

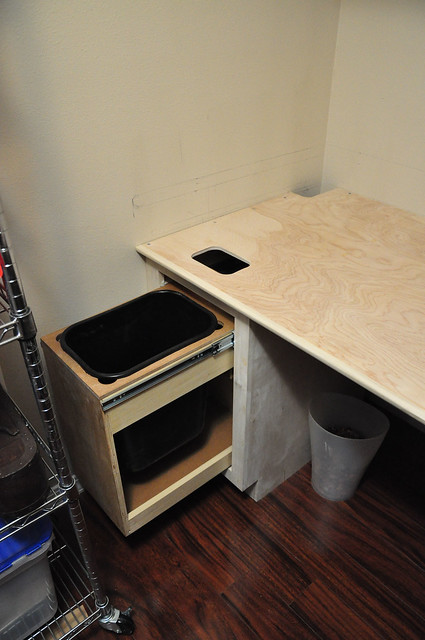
Having a trash can in a cabinet is nothing new. I looked at many pre-built options, but realized it is just a drawer turned upside down. Cut a hole for the bin, add some structure to the bottom and we have a good solution.

I used 100 lb rated drawer slides. If I'm throwing away more than 100 lbs in this little trash can, I have bigger issues than the drawer slide rating.

Here you can also see the lower desk installed. I cut a small hole so trash can be pushed in without needing to open the drawer.
Secret Stash

Here is the secret drawer in the toe-kick area. This area is normally just blocked off, but it seemed like wasted space. I added a small drawer and angled the facing so the seams blend in when closed.

Everyone likes a secret stash. I like having a secret stash. Don't tell anyone where mine is.

I wish I had a secret stash on my other side cabinet, but this idea came late in building.
Lower Desk

Here's the lower desk in place. It is finally starting to look like a real work area.

You can see my old wire shelves coveting my new cabinets. It is like a furniture standoff. Your days are numbered, wire shelves.
View from the inside. The desk top is 1/2" birch plywood with a 3/4" trim on the edges to clean up the profile.

Next Post: Upper Desk